
How to Make Rare Quilted Beauty Makeup Bag
To make a rare quilted beauty makeup bag, choose distinctive fabric and follow a precise quilting pattern. Assemble your materials, including a zipper and interior lining, for a custom finish.
Crafting a rare quilted beauty makeup bag involves creativity and a bit of sewing skill. This chic accessory not only helps organize your cosmetics but also adds a touch of personalized glamour to your daily routine. Quilting allows for countless design possibilities, from classic floral motifs to modern geometric shapes.
Whether you’re a seasoned crafter or a novice eager to try something new, making a quilted makeup bag is a delightful project that yields a functional yet stylish item. Carefully select your materials to reflect your aesthetic, ensuring your makeup bag stands out. By using a unique combination of fabric, pattern, and texture, your creation will be not just rare, but a reflection of your individual style.

Credit: www.ebay.com
Introduction To The Quilted Beauty Makeup Bag
Imagine a makeup bag that combines functionality with a touch of personal charm. That’s the essence of a handcrafted quilted beauty makeup bag. It’s a stylish accessory that holds all your makeup essentials. With unique patterns and a soft, cushioned feel, it stands out in a world of ordinary cases. Now, let’s explore the allure of these bespoke bags and what makes them an essential accessory for any beauty enthusiast.
The Allure Of Handcrafted Makeup Bags
Handcrafted makeup bags are more than just storage; they’re a statement. Each stitch tells a story of craftsmanship and attention to detail. The textures and colors available in quilted varieties make each piece one-of-a-kind. From the selection of fabric to the pattern that adorns the exterior, these bags showcase personal style while protecting your prized cosmetics.
Essential Qualities Of A Quilted Beauty Bag
- Durable Materials: Quality fabrics ensure longevity.
- Soft Padding: Offers extra protection for your makeup.
- Compact Design: Saves space while maximizing storage.
- Zipper Closure: Secures contents and provides easy access.
- Easy to Clean: Certain materials allow for quick cleaning.
A makeup bag is both practical and personal. It must be tough enough to withstand daily use while still looking beautiful. Quilted beauty bags hit the mark here, providing a plush home for beauty essentials. Each quilted pattern also serves as a protective cushion, safeguarding your makeup as you go about your day.
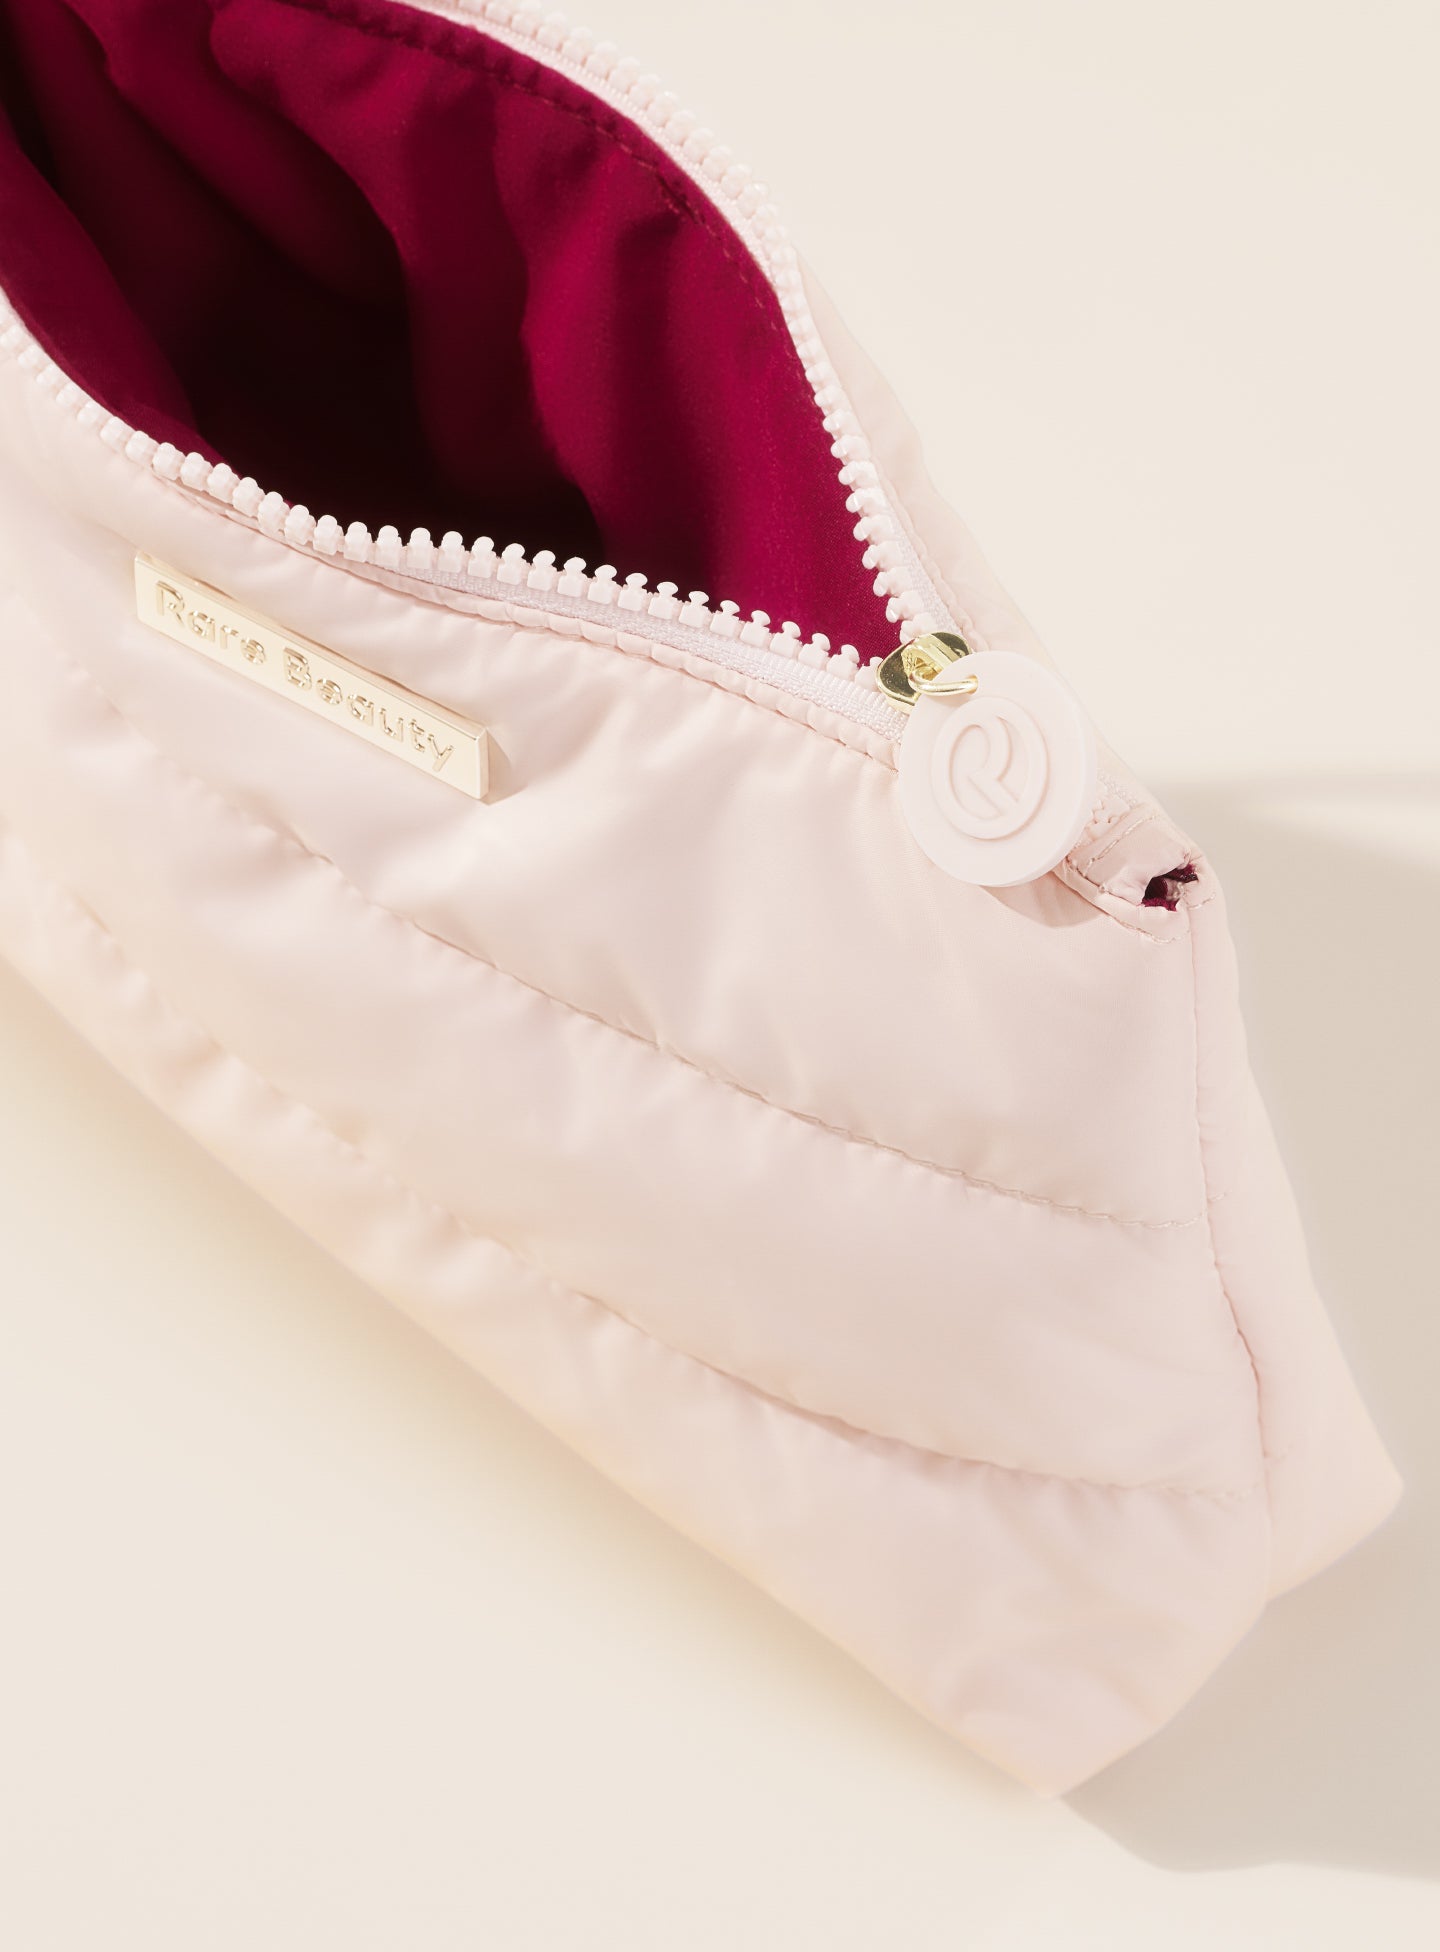
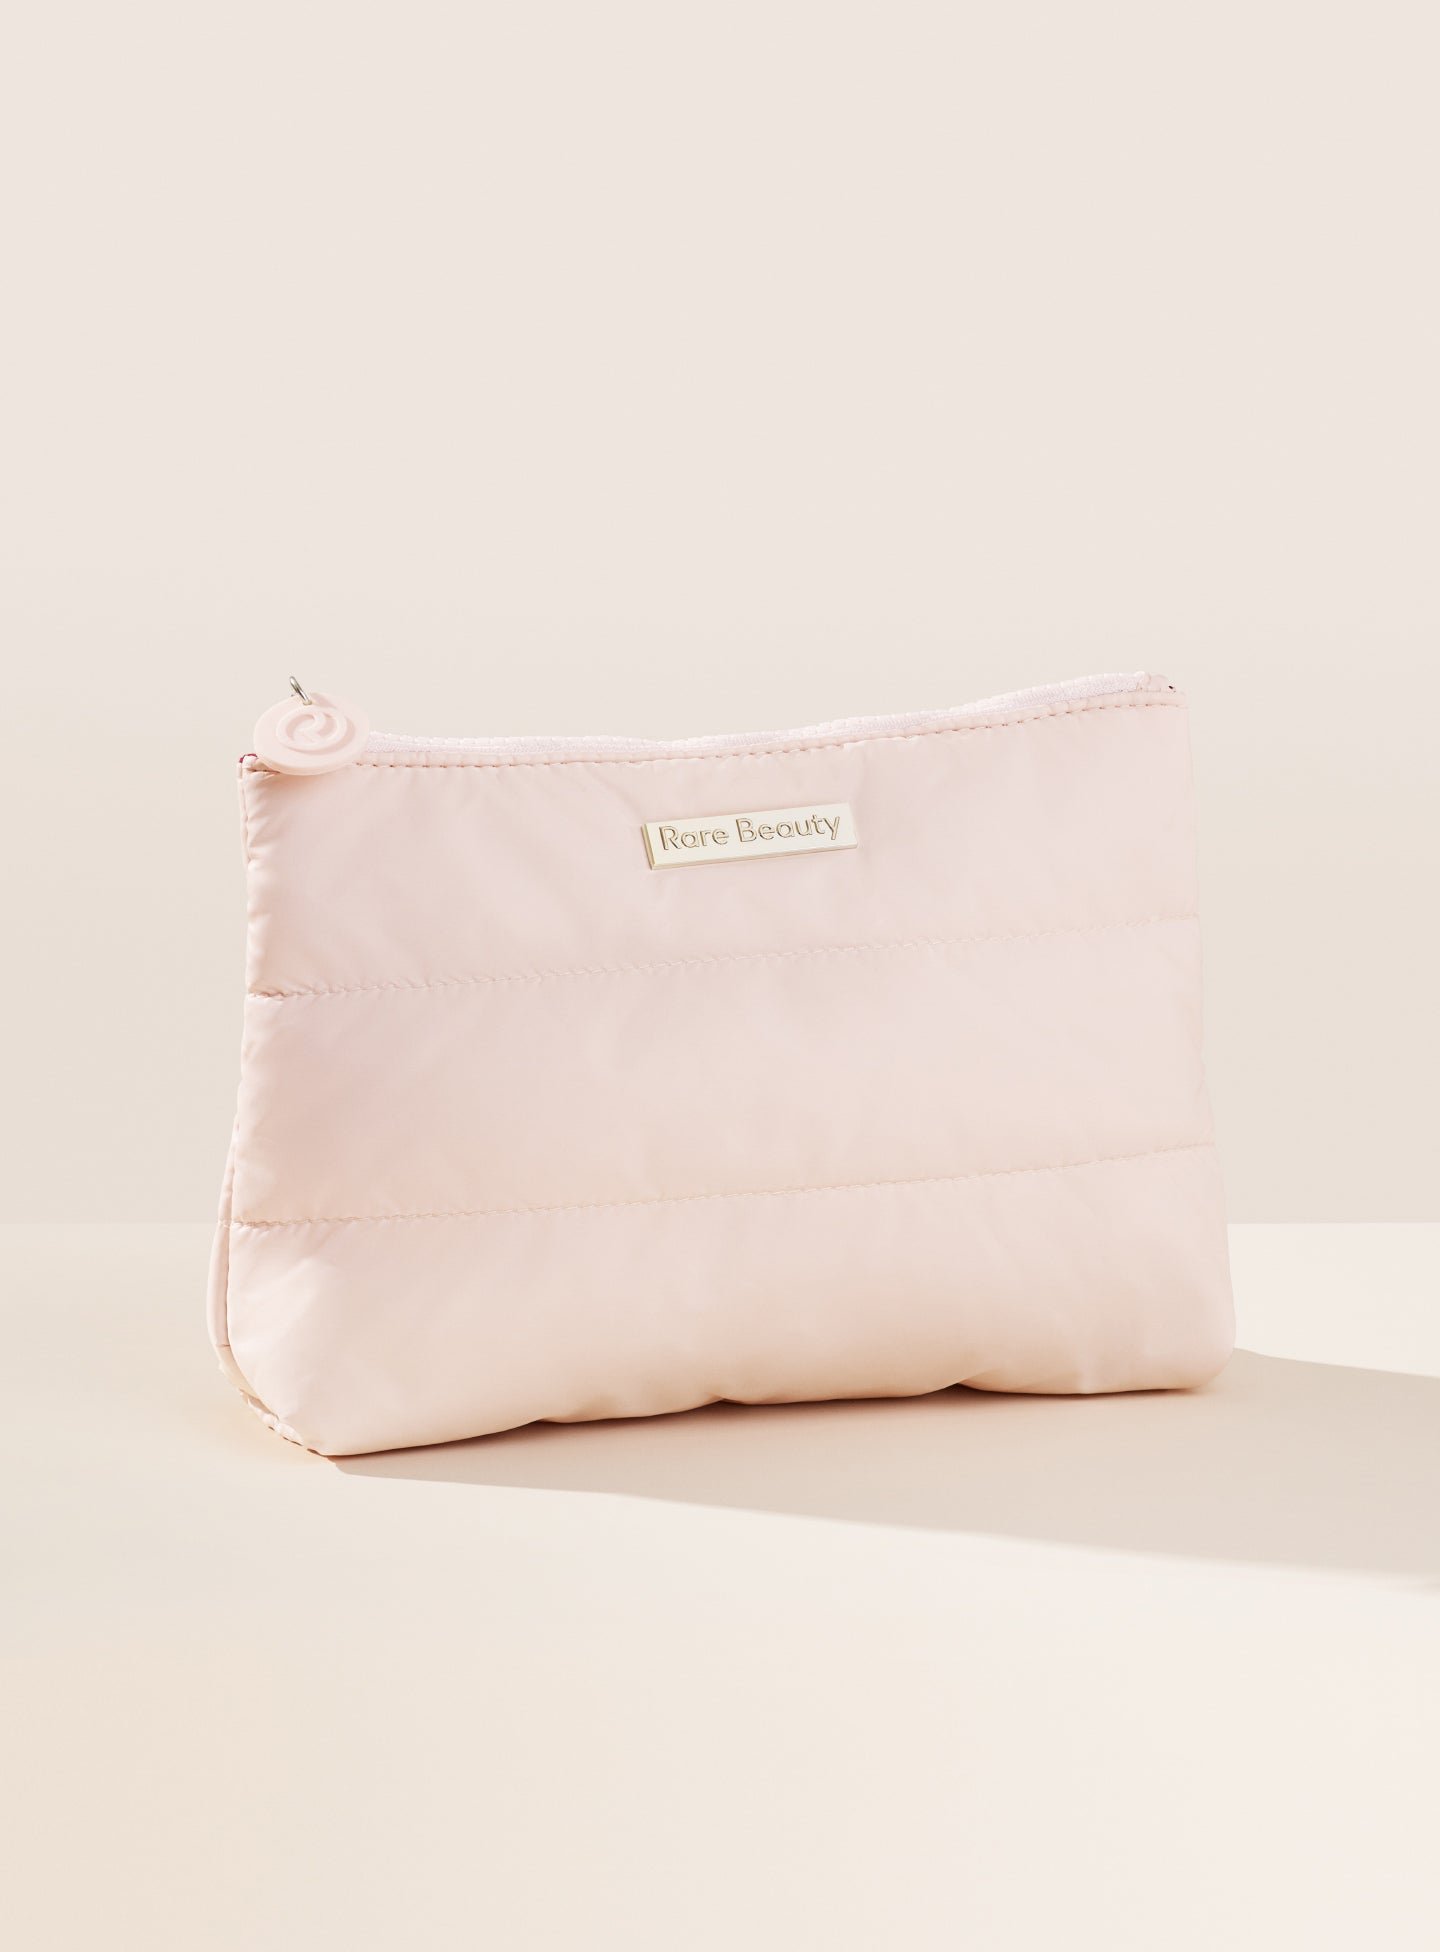
Credit: www.rarebeauty.com
Materials And Tools Required
Embarking on a journey to create a rare quilted beauty makeup bag starts with gathering the right materials and tools. This distinctive project combines craftmanship with practicality, resulting in a stunning and useful accessory. Below, find everything needed to transform vision into reality.
Selecting The Right Fabric And Batting
Choosing high-quality fabric ensures durability and aesthetic appeal. Opt for material that reflects personal style while standing up to daily use. Remember, the outer layer catches the eye, but the inner lining plays a crucial role too. A cohesive look and feel elevate the final product.
For fabric and batting, consider:
- Cotton or canvas for the outer layer
- Water-resistant nylon for the lining
- Quilt batting to give structure and softness
Comprehensive List Of Sewing Essentials
Accurate sewing is a pillar of quilted beauty. A well-stocked sewing kit turns intricate patterns into stunning designs. A sewing machine adept at handling multiple layers is a valuable asset.
| Tool/Supply | Purpose |
|---|---|
| Sewing Machine | Stitching fabric and batting together |
| Fabric Scissors | Cutting fabric and batting |
| Rotary Cutter and Mat | Precise cutting for quilting pieces |
| Measuring Tape | Ensuring accurate dimensions |
| Sewing Pins or Clips | Holding fabric in place while sewing |
| Thread | Matching or contrasting colors for stitching |
| Seam Ripper | Correcting mistakes |
| Quilting Ruler | Guiding precision cuts and stitch lines |
| Iron and Ironing Board | Pressing seams for a clean finish |
| Zipper | Closure for the makeup bag |
Note: Machine needles specific for quilting and a walking foot may greatly facilitate sewing through multiple fabric layers.
Designing Your Makeup Bag
Embarking on the journey of crafting a Rare Quilted Beauty Makeup Bag ignites the spark of creativity and personal style. This distinctive bag becomes not just a container for your beauty essentials but a reflection of your unique tastes. The initial steps in creating this bespoke accessory involve selecting a distinct pattern and size, and infusing it with personalized colors and textures.
Choosing A Pattern And Size
Before diving into sewing, it’s crucial to pick a pattern that speaks to you. Opt for designs that range from simple geometrics to intricate motifs. Here’s how to ensure your selection is both appealing and functional:
- Measure your makeup products to determine the ideal bag size.
- Consider the space required for future beauty purchases.
- Seek patterns with pockets for organized storage.
Whether you need a compact case for on-the-go touch-ups or a larger pouch for your beauty arsenal, ensure the pattern matches your daily routine.
Personalizing With Colors And Textures
Personalizing your Rare Quilted Beauty Makeup Bag is where the fun really begins. Introduce colors and textures that delight your senses and make your heart soar. Apply these techniques for a one-of-a-kind finish:
- Select vibrant hues or soothing pastels to set the mood.
- Choose textures that provide both beauty and durability, like silk or canvas.
- Mix patterns with solid colors for contrast.
Incorporate fabric swatches or paint chips in viewing, to visualize your final product. Remember, your makeup bag is an extension of your style. Experiment boldly!
By following these steps in designing your Rare Quilted Beauty Makeup Bag, you’re sure to create an accessory that is not only a statement piece but a cherished part of your beauty routine.
Cutting And Preparing The Pieces
Welcome to the exciting world of crafting your own rare quilted beauty makeup bag. In this post, we’re diving into the crucial step of cutting and preparing the pieces. Follow these guidelines closely to ensure your makeup bag comes together perfectly.
Precision In Measuring And Cutting
The foundation of a well-made quilted makeup bag lies in careful and accurate measuring and cutting. Here’s how to do it correctly:
- Select the right fabric. Choose high-quality, quilting-weight cotton for best results.
- Gather your tools. You will need a rotary cutter, a clear ruler, and a cutting mat.
- Measure twice, cut once. Double-check your measurements before making any cuts.
- Consult your pattern for exact dimensions. Keep a note of each piece required.
- Align your fabric edges with the cutting mat lines for precision.
Marking And Pinning For Quilted Effects
Creating a quilted look requires careful marking and pinning. Follow these steps:
- Place your cut fabric on a flat surface.
- Use a fabric marker to draw quilting lines. A washable marker ensures no visible marks remain after sewing.
- Evenly space the lines to maintain consistent quilting patterns.
- Secure the layers together with pins. Try to keep pins within the seam allowances to avoid leaving holes in the fabric.
- Recheck your pinned fabric. Adjust if necessary before moving on to sewing.
Assembling The Quilted Layers
Assembling the quilted layers is a crucial step in creating a rare beauty makeup bag with a quilted design. This process involves careful alignment and stitching to turn fabric pieces into a stunning and sturdy quilted accessory. With the right technique, your quilted makeup bag will not only look beautiful but also stand up to daily use.
Creating The Quilt Sandwich
To start, you’ll need to create what quilters call a “quilt sandwich.” This is the foundational structure of your quilted makeup bag.
- Choose your fabrics: Select a cotton fabric for the top layer, batting for the middle, and a lining fabric.
- Cut to size: Trim all layers to the required dimensions for your makeup bag.
- Layer the pieces: Place the lining fabric face down, lay the batting on top, then the top fabric face up.
- Smooth out wrinkles: Ensure there are no folds or creases in any layer.
- Pin the layers: Use safety pins or quilting pins to secure the layers together.
Sewing And Securing The Layers
With your quilt sandwich set, it’s time to bring it all together.
- Baste the layers: Use a long running stitch to secure the layers without pins.
- Stitch in the ditch: Sew along the seams of your patchwork design to add structure.
- Quilting patterns: Choose a quilting pattern and stitch across the bag’s body for extra durability and style.
- Trim the edges: Once quilting is complete, trim any excess fabric to even out the edges.
- Prepare for assembly: Your quilted layers are now ready to be assembled into the final makeup bag design.

Credit: www.ebay.com
Adding The Zipper And Liner
Transform your quilted beauty makeup bag from simple to spectacular by adding a zipper and liner. This step is not just about function, but it also adds elegance. Witness your creation evolve into a durable and stylish accessory.
Zipper Installation Tricks For Beginners
Feeling nervous about zipper installation? Don’t worry. Even first-timers can achieve professional results with these tips.
- Measure twice, cut once: Double-check the length of your zipper against the bag opening.
- Secure with pins: Before sewing, pin the zipper in place to prevent slipping.
- Use a zipper foot: Install a zipper foot onto your sewing machine for close stitching.
- Go slow: Sew slowly to maintain control and ensure straight seams.
Attaching The Liner For Durability And Style
A liner not only beautifies your bag but strengthens its structure. Here’s how to attach it effortlessly.
- Choose the right fabric: Pick a liner that complements your quilted bag and is sturdy.
- Cut to size: Ensure the liner matches the bag’s dimensions.
- Pin in place: Align the liner with the bag interior and pin around the edges.
- Sew with care: Stitch the liner carefully, removing pins as you go.
The trick is to treat the liner as part of the bag, not an afterthought. Stitched together, they form a lasting bond.
Finishing Touches For A Professional Look
Finishing Touches for a Professional Look mean everything when creating your Rare Quilted Beauty Makeup Bag. They transform a homemade project into a polished product. Dive into the final stages with binding and embellishing.
Binding The Edges
Borders define the bag’s shape and provide durability. Here’s a quick guide:
- Measure your bag’s perimeter.
- Cut a strip of fabric 2 inches wide.
- Fold in half lengthwise, press with an iron.
- Align the strip’s raw edges to the bag’s outer edges.
- Sew around, fold over, and topstitch neatly.
This process will give your makeup bag a neat, strong border. It’s essential for both form and function.
Embellishing Your Makeup Bag
Personal touches make your bag stand out. Consider these options:
- Attach decorative buttons or beads.
- Add lace trim or a ribbon bow.
- Use fabric paint for patterns or initials.
- Apply iron-on patches for a fun twist.
Choose embellishments that reflect your style. They’re like your personal signature on the makeup bag.
Caring For Your Quilted Makeup Bag
Your stunning rare quilted beauty makeup bag deserves the best care. Keeping it clean and protected ensures it stays in immaculate condition. Follow these simple guidelines to keep your quilted treasure looking as good as new.
Cleaning And Maintenance Tips
A clean makeup bag is essential for hygiene and longevity. Use these tips to maintain your bag’s beauty:
- Empty the bag: Remove all items to check for spills or stains.
- Gentle cleaning: Use a soft, damp cloth to wipe the exterior.
- Interior care: Turn the lining inside out and clean with a mild soap solution.
- Stain removal: For tougher stains, apply a small amount of gentle detergent and dab gently.
- Air dry: Always air dry the bag, avoiding direct heat or sunlight.
Storing Your Bag To Prevent Damage
Proper storage is key to preventing damage. Here’s how to store your quilted makeup bag:
- Avoid crushing: Store in a spacious area to maintain its shape.
- Mildew prevention: Keep in a cool, dry place away from moisture.
- Fill for shape: Use soft tissue paper to fill the bag when not in use.
- Separate cosmetics: Use smaller pouches for leak-prone items.
- Dust bag: Use a fabric dust bag for long-term storage.
Expanding Your Skills With Advanced Techniques
Are you ready to take your quilting skills to new heights? Crafting a Rare Quilted Beauty Makeup Bag isn’t just about stitching pieces of fabric together. Embrace advanced techniques that will bring your creation to life. Expand your repertoire and make a statement piece that is both practical and enchanting. It’s time to innovate, explore, and create something truly unique.
Exploring Embroidery And Appliqué
Embroidery and appliqué are jewels in the quilting crown. These advanced skills allow personal touches that can turn simple quilts into art. Here’s how to get started:
- Choose vibrant threads to bring designs to life.
- Sketch your patterns first or transfer designs using tracing paper.
- Master the basic stitches: straight, backstitch, satin, and chain.
- Practice on scrap fabric before applying to your bag.
- Use appliqué for adding complex shapes and layers.
Experiment with different textures and effects. Combine these techniques to produce a makeup bag that stands out.
Innovating With Three-dimensional Designs
Why stay flat when you can go 3D? Three-dimensional designs give your makeup bag a pop of life. Here’s how to start crafting:
- Pick a theme that resonates with your style.
- Create a stencil of your 3D element.
- Cut out fabric shapes and layer them for depth.
- Secure shapes with pins before finalizing with stitches.
- Use padding to add volume and texture.
By mastering these advanced quilting techniques, your makeup bag transforms from a flat pouch into a chic accessory bursting with character.
Remember: Patience and practice are key. Start with simple projects. Gain confidence as your skills develop. Soon, you’ll create the Rare Quilted Beauty Makeup Bag of your dreams, with textures and designs that tell your unique story.
Gallery Of Inspiration
Embark on a creative journey filled with textures, patterns, and innovation. Each quilted makeup bag in our ‘Gallery of Inspiration’ exhibits a unique blend of style and function. Behold a visual feast that not only ignites crafting passion but serves as a blueprint for your rare quilted beauty makeup bag project.
Showcasing Unique Quilted Makeup Bag Designs
Our collection shines with exclusive quilted makeup bag designs. Witness the intersection of artistry and practicality in each stitch.
- Floral fantasies: Blossoming with vibrant colors and intricate patterns.
- Geometric wonders: Bold shapes woven into eye-catching compositions.
- Classic chic: Timeless aesthetics meeting modern necessities.
Stories Behind Handmade Creations
Every handmade quilted bag carries a tale of inspiration and dedication. We share personal journeys of crafted excellence, from idea to final stitch.
- Carol’s Patchwork Prowess – A quilter with 20 years experience masters a new technique.
- Amy’s Ocean-Inspired Oasis – Marine life motifs bring a wave of freshness to cosmetic storage.
- Victor’s Vintage Vision – A modern twist on retro designs creates a unique storage piece.
Conclusion: Unveiling Your Creation
The time has come to step back and admire the quilted beauty makeup bag you’ve brought to life. Stitch by stitch, you’ve transformed simple materials into a rare and functional piece of art. Let’s take a moment to reflect on this journey and plan for the endless possibilities that lie ahead.
Reflections On The Crafting Journey
Creating something by hand is a rewarding experience. Seeing your vision take shape, from picking out fabrics to the final thread, builds not just a makeup bag, but also confidence in your crafting abilities. As you look at your completed project, think about the skills you’ve honed:
- Choosing the right patterns for visual appeal
- Mastering the technique of quilting
- Improving sewing precision
Encouraging Future Projects And Community Sharing
Your handmade makeup bag is just the beginning. Use this achievement to fuel your next creative endeavor. Consider joining a crafting group or online community to share your work and find inspiration for new projects. Here are ways to engage:
- Showcase your work on social media
- Attend craft fairs or workshops to connect with others
- Explore online forums dedicated to quilting and sewing
By sharing your experience, you help others learn and create a ripple effect in the world of DIY beauty.
Frequently Asked Questions For How To Make Rare Quilted Beauty Makeup Bag
What Is The Best Fabric To Line A Makeup Bag?
Nylon is the best fabric for lining a makeup bag due to its durability and water-resistant properties.
How Do You Set Up A Makeup Bag?
Select a versatile bag with compartments. Prioritize essential items: foundation, mascara, lipstick, and eyeliner. Include multitasking products and personal must-haves. Keep tools like brushes and tweezers. Regularly clean out and refresh contents.
Can I Wash Makeup Bags In Washing Machine?
Yes, you can wash makeup bags in the machine if the material allows. Check the care label for specific instructions and use a gentle cycle.
How Do You Get Makeup Out Of A Makeup Bag?
Empty the bag and shake out any loose powder. Use a makeup remover wipe to gently clean the interior. For stubborn stains, dab a bit of rubbing alcohol on a cotton pad and blot. Let the bag air dry before returning your products.
Conclusion
Crafting your own quilted beauty makeup bag is not just a creative endeavor; it’s empowering. This project lets you personalize an accessory staple, combining functionality with your unique style. The satisfaction of completing such a piece, designed and sewn by you, is incomparable.
Remember, practice makes perfect, so enjoy each stitch on your journey to creating a rare, quilted treasure.